Monday, April 26, 2010

Grinding away at the dead and crusty

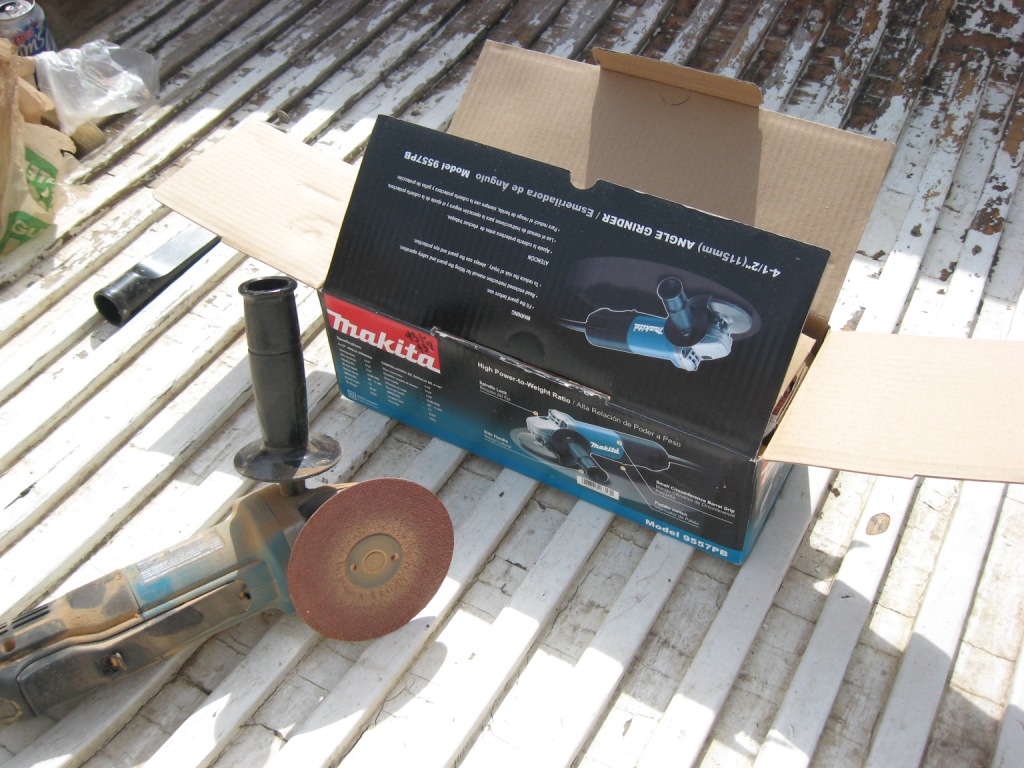
Sunday was a good day for grinding more of the outside finish, and I found it goes faster the more you get the feel for the grinder in your hand.  I also learned to DRAG the grinder instead of pushing it.  You end up with fewer gouges that way.
Using a fine grinder pad wasn't especially productive or useful.  They just wear out faster.  You can tell when the pad is wearing out when it either is taking the surface off slower, or you start to make burn marks on the wood.  If you're making burn marks, you're probably just taking stuff off with mainly friction, like when you have a dull blade on a circular saw.
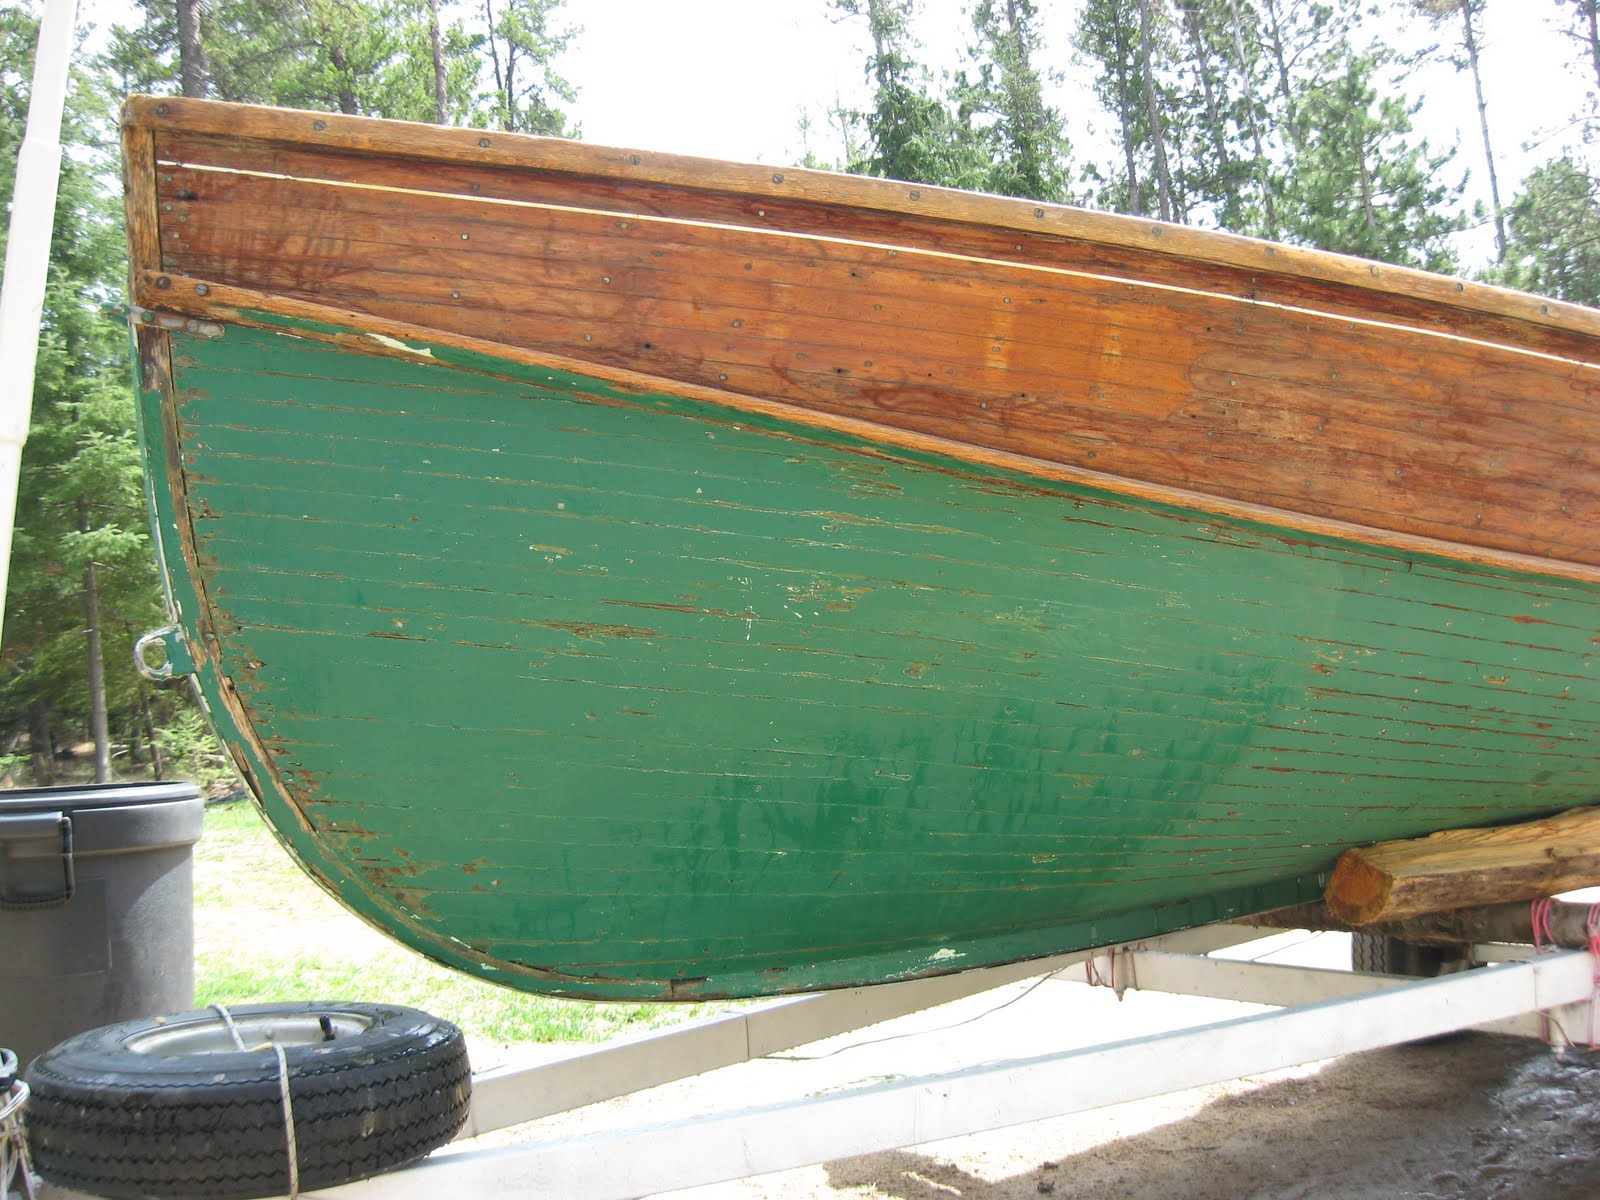
I now have the old finish off of the sides, the back end, and the top of the bow; also the gunwales and splashboards which are made out of oak and are a lot harder than the cedar strips of the rest of the boat (duh).
So I'm thinking next to start on the inside of the boat, which I'm expecting to use a drill with an attached stripper tool on it.  It's about an inch or so wide, and hopefully it will fit down between the ribs and all that old white paint will come off.
At the end of the day, while gazing at what I'd accomplished (back to the Zen thing), I realized that the process could be a metaphor for renewal in a human sense.  I haven't developed the details of what is to learn there, but it's something about when you get older and have endured weather (and maybe some neglect) and your outside is a bit dead and crusty...  but inside you still have that beautiful and original construction material with it's living color and scent and feel.
Maybe you can (comment) tell me what it means to you...  Technical project suggestions welcome also!
Happy Boating!

Monday, April 19, 2010

Mom said "don't grind your teeth"...

After seeing that I was getting nowhere fast with the stripping, I tried using the oscillating sander on half of the back end.  After a relatively long time wearing out sandpaper on half of it, I had limited results.  That's when I realized that I'd be working on this project most weekends this summer and maybe getting it in the water before the end of the season...

So that's when I went to Home Depot to look for a power tool that might speed up progress. The Tool Guy there set me up with a grinder with a sanding attachment.

GRINDERS EAT WOOD!

On the left is what the chemical stripper did on the front of the hull.  It pretty much didn't even bubble the rock-hard green paint.  Now on the right, here's just a couple of minutes with the grinder on the same spot.  Right down to the wood - no questions asked!  Yippie! The back side section was down to bare wood in a comparatively short period of time. And the entire back end had the same result.
There's a cautionary tale here -
 the grinder isn't something you want to take after your grandma's old furniture!!! 
It does some serious finish and wood removal pretty fast.  It's going to take the finish off the outside of the boat in a big hurry, and polish the metal fasteners along with it.  When you hit the nails, sparks are flying!  It takes awhile to get the touch so you don't end up with big circular gouges.

Mom always said "Don't grind your teeth."  Moms know best.

Sunday, April 18, 2010

Ain't no silver bullets!

I was imagining that the old paint and varnish would be dropping off like leaves from a tree in the autumn...  But that stuff is definitely not a quick shot to the heart of the matter.

My first attempt with the chemical stripper, I spread it on thick over a few large areas of the boat, then went inside and diddled around for about 30 minutes; then went back out expecting everything to come off like the peel on an orange.  NOT!

One thing that happened was that the sun had gotten stronger and the stripper had dried in several places.  I took a scrubber to the varnished area and a lot of it flaked off, but the finish was only about 50% removed.  Areas with ancient old paint on them, less than half came off with an initial scraping with the putty knife.

I rinsed it all with mineral spirits per the instructions, which didn't seem to really do anything at all.  I think that step is probably more useful after you have virtually all the finish off and just want to clean it up some more.

It was then that I realized that this was going to be a lengthy project afterall...  I thought of putting a wire brush on my drill and going after the paint that way, but knew it would tear the heck out of the wood, which is fairly soft in many places.  I think a vibrating sander would be a hard way to go too because of all the pieces and seams.  So I tried a different approach with the stripper.

I sat down in the back of the boat and started painting on the chemical again, and where it didn't seem to be having much effect, kept painting the stuff on.  As I was able to scrape paint off, I'd suck up the globs with the shop vac, and then put more stripper on the part that hadn't dissolved that much.  I'd guess I spent at least a couple of hours on the back corner of the boat to get the results that show up in the picture.

Being that it's mid-April, it could easily be mid-June before all the finish is off, just mostly working weekends.  Or it could even be early fall, depending on what comes up in the meantime.  Oh well, it looks like it will be
"steady as she goes"!

Saturday, April 17, 2010

Lung stripper...!

Whoa!  Be forewarned about chemical strippers - they are highly toxic and the fumes will go right to your head!  When I crawled up under the bow and started painting this stuff on, I had to retreat pretty quick cuz it was just seconds before I began to feel the effects.The other thing about the chemical stripper is that you definitely want good rubber gloves, and be very careful to not get it onto your skin or it will start to burn.

First thing this morning I pulled the boat out of the garage and onto the gravel driveway; then started to take off parts and remove the seats.  I noticed that the brass pieces were still in really good condition, but that steel screws, for example, were pretty rusty and will have to be replaced.  I'll probably get as much brass stuff as practical, or at least galvanized steel.  The brass screws and bolts came out easily, but the rusty steel stuck and stripped out the hole as it was coming out.

Once all the seats were out, a shop vac was really handy to get all the loose paint chips and dirt and pine needles out of the boat.  It really seemed like I was making a lot of progress pretty quick.

After smearing the stripper on and letting it work for awhile, it seemed that it was going after the paint and bubbling it up a lot faster than it was eating the varnished parts.  I'm guessing that tells me something about the difference in wood protection between paint and varnish.  The varnish really seemed to be stuck tight to the wood.

The label says to wait 15-30 minutes and then start scraping the loosened finish off with a plastic putty knife.  It will probably be a good break to get away from it too and breathe some fresh air and load back up on coffee.

Something tells me that the hard part is about to begin.  Or maybe the harder part, and it just keeps getting harder?  At least it's getting me out into the beautiful spring weather.  It still freezes here overnight, but the days are up into the 60's F, which is well nigh tropical up here in the northwoods!

Well, here's hoping your project is going well.  I'll be back with another report later.


Friday, April 16, 2010

Start stripping!!!

I found some pretty good tips online on what to do and not do for this weekend.  Sounds like do not plan on scraping and sanding unless you have way too much time and energy (that's not me).  Last fall I took the powerwasher and blew off most of the loose stuff (a lot of the white paint came off the inside quite easily).  Husky makes a pretty good unit for about 100 bucks that you can have all sorts of fun with on your house, car, sidewalk, and your dog.  Just be careful not to use the most powerful stream on anything soft or light plastic (like the rain pants I had on).  See how to strip a boat before painting it from SailingAhead.com.  Another good one on getting a smooth (boat) bottom is "Sand, Blast, or Strip Your Way to a Smooth Bottom" at the Cruising World website.

Depending on how many layers of paint you might have would seem to indicate the type of chemical stripper you want to use.  The label may or may not be a good indicator of what to expect, but there are some that claim to be able to take off as many as 10 layers like Peel Away® at about $50 a gallon.

I'll probably go to Home Depot or Fleet (cool man stores) and pick out a medium priced product with a cool name.  It looks like the inside floor didn't have any kind of super duper paint on it, since the washer took a lot of it off pretty easily.  The varnish on the natural wood maybe a bit tougher to get off.

Anyway, I'll report back soon on the results and some pictures - stripping pictures...  Just remember, strippers get undressed for work!  (you knew something like that was coming, didn't you?)

Thursday, April 15, 2010

Which end do you start at?

When you eat a hotdog, the most serious question always is "which end to bite into first?".  Since of course a wooden fishing boat looks just like a hotdog, that's exactly what I've been thinking the past few days as I observe it there in the garage.  So, first things first, I believe I'll need to eat a hotdog.  (thanks to MushingTV on Facebook for the photo)  But seriously folks, I'm glad that I haven't had time to do any serious damage to it yet since my weekday evenings are occupied with eating and watching TV and Netflix.

My first inclination was to start poking around on the boat and chipping out the rotten wood.  But I'm thinking now that I should restart the process and determine the second thing to do second.

So my plan is (chime in here anyone that knows better):
  1. Remove all the attached parts such as the railings and trim pieces and moldings and seats
  2. Get a big bucket of paint and varnish remover and then scrape off the paint and varnish from the surface of the wood and hose it down in the driveway
  3. Let the boat dry in the garage during the week while I go back to eating and watching TV
  4. Stare at it each morning until the answer comes on the third thing to do third OR who's on first and what's on second...

Tuesday, April 13, 2010

Counting the cost

So if you set out to repair an old boat, a consideration should be if you have the wherewithall to finish it, right?  My problem with wood is that I can cut it and burn it.  Other than that, making pieces fit together in a precise manner has never come naturally.

I'm thinking that it will be critical to observe the caveat "measure twice and cut once", among others.
But I think I found a boat that I can reasonably get into the water and have it be functional at least.  Might not be the the most perfect restoration when it's complete, but at least it only cost me $300 (so far).  I know that boats can be a big hole that you pour money into.

Perhaps it was getting the ol' cart before the horse, but I also bought a 1975 Mercury 20hp outboard from a guy over in West Fargo, ND for $350.  So my investment more than doubled pretty quick.  (This picture is of a 50 horse.  I haven't brought home the motor yet.)

I did already have the trailer, which was good.  That came from last summer's boat project.  I got a 1960's catamaran sailboat in useable shape for $200 including the trailer.  That mostly cost me some elbow grease in addition, plus some paint for the wood parts and a big hunk of wood for a new rudder which I planed into shape.  It also cost a trip to the ER when the 30-foot mast came down and hit me in the head...  My wife said it had that same distinctive sound like when someone hits a baseball with an aluminum bat.  So that sailboat already went into retirement and I got a smaller one that I can safely put the mast up and down on by myself.  This one's looking for a good home nearby where it can be parked in the water for the season with the mast up.

(to be continued...)

Monday, April 12, 2010

Why fix up an old wooden boat?

It's a nostalgic thing I suppose.  Growing up we spent summers on Ottertail Lake in Minnesota fishing, swimming, sailing, digging in the sand, jumping off the dock, and driving a boat all around the lake.  From about the age of 4 (circa 1955) through high school.

And it's a wooden boat, probably more than anything else, that can elicit the sights and sounds of a lake.  Parked out at the fishing hole in the evening, every sound carries - the clunk of the oars, shuffling the tackle box on the floor of the boat, and fishermen talking in low tones about the weather, the bait, and where the heck are all the fish.

So it was with that in mind that I began a search for an old wooden boat that I could put a motor on and enjoy on the lakes around Bemidji, home of Paul Bunyan and Babe the Blue Ox.

There really aren't that many wooden lake boats around anymore that haven't rotted away behind someone's boat house.  Haven't seen one on the water for a really long time.  Mostly you might run across one that's being used for a flower planter in the yard in Perham or Foxhome or in front of a farm house.

So it was with irrational exhuberance that we drove down to Alexandria and plunked down 300 bucks for this old boat last fall.  I wrapped a tarp around it to protect it from the snow over winter.  And just last weekend I pulled off the cover and moved it into the garage, now that we can park outside again. 

It's close to 18 feet long, which is pretty big for a regular lake fishing boat.  The hull is in pretty good shape - the bottom planks don't have any big gaps between them or anything.  When I started poking around with it up on the bow, I found a fair amount of dry rot around and under the top trim piece.

(to be continued...)